 English (Canada)
 Dansk
Dansk Deutsch
 English
 English (UK)
 Español
 Francais
 Italiano
 Magyar
 Nederlands
 Norsk
Norsk Polski
 Português (Brasil)
 Pycckui
 Suomi
Suomi Svenska
 עברית
עברית العربية
 日本语
日本语 繁體中文
繁體中文 한국어
한국어
How to stack two 9200 switches?
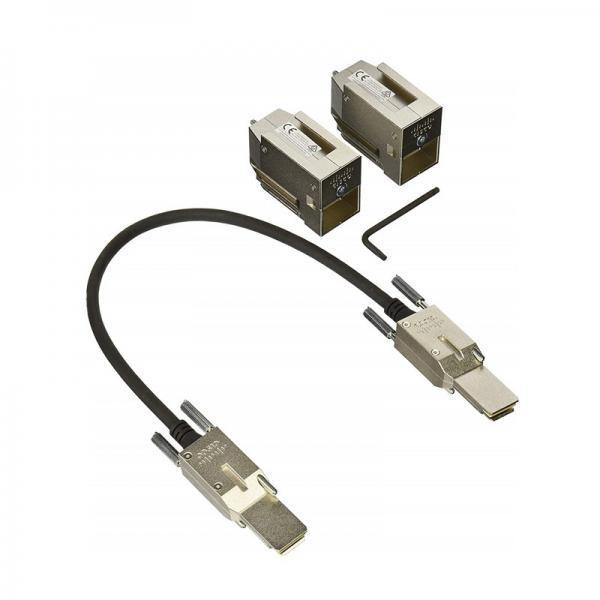
Stacking Cisco Catalyst 9200 switches is a common practice in networking to increase redundancy, simplify management, and enhance performance. When you stack switches, you essentially create a single logical switch from multiple physical switches. This setup allows for seamless management and configuration as if you were dealing with a single unit, while also providing benefits such as increased port density and redundancy. Here is a comprehensive guide to stacking two Cisco Catalyst 9200 switches.
Understanding the Basics
Before you begin, it's important to understand some key concepts related to switch stacking:
-
StackWise Technology: Cisco's StackWise technology enables the stacking of switches. This allows multiple switches to operate as a single switch, providing a unified data and management plane.
-
Stack Members: Each switch in the stack is referred to as a stack member. They are identified by a stack member number.
-
Stack Master: One of the switches in the stack acts as the Stack Master, which manages the stack and controls all operations.
-
Stack Cables: Special stack cables are used to connect the switches. These cables ensure high-speed data transfer between the stack members.
Preparation
-
Equipment Required:
- Two Cisco Catalyst 9200 switches.
- Stack cables to connect the switches.
- Power cables and any necessary network cables.
-
Placement: Physically place the switches in the same rack or close proximity to minimize cable length and ensure optimal performance.
-
Power: Ensure both switches are powered off before making any physical connections.
Physical Setup
-
Connect Stack Cables:
- Use the stack cables to connect the switches. Connect the StackWise ports on the first switch to the corresponding ports on the second switch.
- Typically, you connect port 1 on the first switch to port 2 on the second switch and vice versa to create a loop, which is crucial for redundancy.
-
Power On:
- Once the stack cables are connected, power on both switches. It’s generally recommended to power them on simultaneously to allow them to negotiate roles and form the stack seamlessly.
Configuration Steps
-
Access the Switch CLI:
- Connect to the console port of one of the switches using a console cable and terminal software (like PuTTY or Tera Term).
-
Verify Stack Ports:
- Use the command
show switch stack-portsto verify the stack ports are correctly connected and recognized by the switch.
- Use the command
-
Assign Stack Member Numbers:
- By default, switches will automatically assign stack member numbers. However, you can manually configure these using the command:
switch [current-number] renumber [new-number] - Ensure each switch has a unique stack member number.
- By default, switches will automatically assign stack member numbers. However, you can manually configure these using the command:
-
Set Priority Levels:
- The switch with the highest priority will become the Stack Master. Assign priority using:
switch [member-number] priority [priority-value] - Values range from 1 to 15, with 15 being the highest priority.
- The switch with the highest priority will become the Stack Master. Assign priority using:
-
Save Configuration:
- After configuring the stack, save the configuration using:
write memory
- After configuring the stack, save the configuration using:
Verification
-
Check Stack Status:
- Use the command
show switchto verify that both switches are part of the stack and identify the Stack Master.
- Use the command
-
Test Redundancy:
- Disconnect one of the stack cables and observe if the stack remains operational. This tests the redundancy of your stack configuration.
-
Check Port Channels:
- If you have configured port channels, ensure they are functioning correctly by using:
show etherchannel summary
- If you have configured port channels, ensure they are functioning correctly by using:
Maintenance and Troubleshooting
-
Regular Monitoring:
- Regularly monitor the stack using commands like
show switch stack-portsandshow switchto ensure all components are functioning correctly.
- Regularly monitor the stack using commands like
-
Firmware Updates:
- Keep the switches’ firmware updated. You can update the firmware of the entire stack from the Stack Master, simplifying the process.
-
Troubleshooting:
- If any issues arise, check physical connections first. Ensure stack cables are securely connected and not damaged.
- Utilize logs and debug commands for deeper insights into potential issues.
Benefits of Stacking
-
Simplified Management: Manage multiple switches as a single entity, reducing complexity and administrative overhead.
-
Increased Redundancy: The stack can continue to operate even if one of the switches fails, ensuring continuous network availability.
-
Scalability: Easily add more switches to the stack as your network grows, increasing port density without needing additional management interfaces.
-
Enhanced Performance: Increased bandwidth and reduced bottlenecks due to the high-speed interconnections between stacked switches.
Considerations
-
Compatibility: Ensure that all switches in the stack are running compatible IOS versions to prevent issues during stacking.
-
Stack Capacity: Be aware of the maximum number of switches that can be stacked together. For Cisco Catalyst 9200, up to eight switches can be stacked.
-
Power Supply: Consider using redundant power supplies to further increase the reliability of your stack.
By following these detailed steps, you can effectively stack two Cisco Catalyst 9200 switches, optimizing your network infrastructure for better performance and reliability.


